FREE PATTERNS
Miki
oxHeartsTreasuresxo


Subscriptions are FREE! Subscribe & receive coupon codes for 30% ~ 40% off Patterns and Plushies in my Etsy shop! There will also be many other fun things & freebies in store just for subscribers ONLY ~ so don’t miss out !
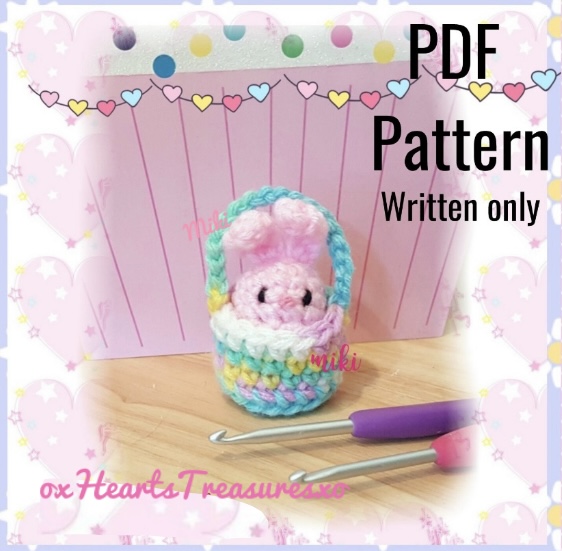
**This sweet and ever popular Bitty Bunny in her basket was designed by Miki Kim (2019). Please DO NOT claim this pattern or ANY parts of it as your own. You may show or sell your own Tiny bunny in her basket from this pattern, but please credit the design to Miki ~ oxHeartsTreasuresxo.com or INSTAGRAM @oxHeartsTreasuresxo.tm ! Thank you soOo much and I hope you enjoy creating your sweet bitty bunny !!! **
Bitty Bunny in Basket ~ A FREE to WEBSITE pattern:
Note: Crochet Hook: 3.5 mm (Bunny) Crochet Hook: 4.0 mm (Basket). *Everything is crocheted in rounds to prevent spiraling. Bunny’s height to tip of ears will be just under 2″ tall. Basket height to top of handle will be approximately 2 1/2″ tall
Yarn: *You may use any color and brand yarn you like ~ just make sure it’s yarn of Medium weight and you should be fine!
************************************************************
TERMS: MR ~ Magic ring, SC ~ Single crochet, HDC ~ Half Double crochet, DC ~ Double crochet, INC ~ Increase, BLO ~ Back Loop only, DEC ~ Decrease, SLIP ~ Slip stitch, Chain
************************************************************
BUNNY EARS (Make 2)
Chain 7. From the second chain from hook, do the following: DC x 3, HDC x 2 Leave a long tail for sewing
BUNNY
R1: MR 6
R2: INC x 6 = 12
R3 ~ R6: SC 12
Stuff. With black yarn, add eyes on row 4 with 2 stitches between eyes. Add a tiny pink nose with baby pink yarn in between. Attach ears next to each other on the first row. One side of each ear going through the top center, while the other side of the ear going between rows 1 & 2 (making each ear rest above the first row). Knot the ends together at the bottom and cut off excess yarn.
R7: DEC x 6 (Finish)
************************************************************
BUNNY TAIL
Cut 7 to 8 short pieces of yarn of your choice approximately 2″ long. With another piece yarn tie the pieces together tightly into a knot. Trim into a small pom pom shape (do not cut the yarn you used to tie the tail together). Attach your bunny’s tail in the back towards the bottom and cut away excess yarn.
************************************************************
BASKET
R1: MR 6
R2: INC x 6 = 12
R3: (SC, INC) x 6 = 18
R4: BLO 18
R5 ~ R7: SC 18
Chain 20, finish and cut yarn leaving a short tail for sewing. Attach this end to the opposite side of basket by weaving into the stitches. Cut off the excess. You now have a sweet tiny bunny to enjoy in her very own basket ;)! *************************************************************
I hope you love your Tiny bunny in her basket. I really enjoyed making her pattern! If you have any questions regarding this pattern, please feel free to contact me at: oxHeartsTreasuresxo@gmail.com
*I would love to see your finished work! Tag me @oxHeartsTreasuresxo.tm (Instagram)
*Thank you so much again! Have a wonderful day!
